Metal Working! Fitting, Machining, Welding, Sheet and General Metal Fab
- Thread starter Urban DH
- Start date
Similar process but different outcomes. The point with pressure piping was to locally refine grain and relieve surface stresses or at least artificially reduce grain size while keeping the finish as smooth as possible. Magnetite likes growing on large grains and flaking off. The bond strength is low and the flakes then build up in the lower parts of the pendants. To the extent that after heating cooling cycles the pendant could become partially blocked and the magnetite causes localised overheating which is bad juju. Same principle for SCC because it stress relieves on a micro level and also minimises access to grain interfaces. From what I saw about the women police constable it provides micro pockets for lube as well as stress relieving the surface. Maybe just a difference in media size but the media also gets micro embedded into the surface, piss all I know but this could also assist with wear resistance.
link1896
Mr Greenfield
I knew someone a decade ago who was a well regarded engine builder for Andra drag racers.My understanding was that it was developed in Japan and has taken off in motorsport in the US with the process often being applied to rods, pistons, cams and gearsets.
Sent from my M2012K11AG using Tapatalk
One category he specialised in was based on the 400ci small block Chevy format, blown with methanol, 1300-1500hp.
There would be hospitals in the third world less clean then his workshop.
Everything was cryogenically treated in the USA. He mentioned no one offered the service here at the time.
Sent from my SM-A145F using Tapatalk
You're telling the story.Micropeening
More of a novellaYou're telling the story.
hellmansam
Likes Bikes and Dirt
I have a chinese 10 x 20'lathe, had it for a year and am learning meself to do stuff with it. Recent efforts include turning down a whisker off a OneUp mini EDC tool holder because it wouldn't seat in my new fork. Tricky to hold it in the chuck, just a bit at the bottom needed slimming down so I got a piece of Delrin and bored it to snugly fit the EDC tool holder with a firm push in by hand. Chucked it in the chuck and turned it down a little but at a time until it fit nicely in the fork.
A lot of time can be spent making jigs and fixtures to let you do the job. When I was machining the bores of the Ram tubes to match the throttle bodies for the xr4 I had to make an adapter that the tubes bolted to. Took 3 hours all up and then the machining was about 60 seconds per piece!I have a chinese 10 x 20'lathe, had it for a year and am learning meself to do stuff with it. Recent efforts include turning down a whisker off a OneUp mini EDC tool holder because it wouldn't seat in my new fork. Tricky to hold it in the chuck, just a bit at the bottom needed slimming down so I got a piece of Delrin and bored it to snugly fit the EDC tool holder with a firm push in by hand. Chucked it in the chuck and turned it down a little but at a time until it fit nicely in the fork.
When I was buying my vertical bandsaw a mate with the same one complained how hard it was to change blades and set the blade up so he just runs one general purpose blade. I wanted to do metal and wood so had several blades. Actually it takes about 5 minutes to swap a blade. No idea how he would cope with a lathe or mill. I think the record set up was a whole day to mount a rocker cover so I could skim the base then cut flats on top for a cover plate.
Good job working out how to support the work.
SummitFever
Eats Squid
So true. Often the spindle run time is a small part of the actual job. Machine cleaning and maintenance is also a significant part of the job (although perhaps not for everyone judging by the state of some second hand machines).
ausdb
Being who he is
Not much biking for me lately but almost ready to make chips on a new toy. Unfortunately the first project wont be bike related, a resized coffe tamper has a higher priority. Some shock hardware will be next tho

Any suggestions on lighting for a lathe? the light in my shed is pretty shite and I've got old man eyes. I've got a 600mm LED fluoro I was planning on mounting it centrally along the lathe axis with some aluminium uprights screwed into chip guard at the back.
Any suggestions on lighting for a lathe? the light in my shed is pretty shite and I've got old man eyes. I've got a 600mm LED fluoro I was planning on mounting it centrally along the lathe axis with some aluminium uprights screwed into chip guard at the back.
Last edited:
fjohn860
Alice in diaperland
Plug handle finished.Did talk about this a while back after breaking a plastic one off in the lever.
Finally got some spare time to make it.
View attachment 402046
View attachment 402047
View attachment 402048
View attachment 402049View attachment 402045
Still need to do some polishing/finishing and turn the handle for the plunger/plug
beeb
Dr. Beebenson, PhD HA, ST, Offset (hons)
Dayum son.
")
Query though - should the lip-seal not be mounted the other way round? I guess there's not really much pressure at play, but it seems like the fluid might leak past the seal that way...? Probably fine either way for the tiny fluid volume and only gravity pressure realistically.
fjohn860
Alice in diaperland
Yes it should be mounted the other way in a pressure situation. I leak tested it with the cup full for a few hours and there was no leakage (it is a pretty tight tolerance fit in the funnel). Initially I was worried about the seal sliding off the end of the handle, but there is enough of a step that it shouldn't.Dayum son.
Query though - should the lip-seal not be mounted the other way round? I guess there's not really much pressure at play, but it seems like the fluid might leak past the seal that way...? Probably fine either way for the tiny fluid volume and only gravity pressure realistically.
Yes it should be mounted the other way in a pressure situation. I leak tested it with the cup full for a few hours and there was no leakage (it is a pretty tight tolerance fit in the funnel). Initially I was worried about the seal sliding off the end of the handle, but there is enough of a step that it shouldn't.
link1896
Mr Greenfield
Any suggestions on lighting for a lathe? the light in my shed is pretty shite and I've got old man eyes. I've got a 60mm LED fluoro I was planning on mounting it centrally along the lathe axis with some aluminium uprights screwed into chip guard at the back.
You want a big light source to minimise shadows. One of the LED ceiling lights for grid ceilings that's half the drop in tile size is great. Still want to add a point source that's behind the tail stock shining into the work piece so when you're working deep, you can see what you are doing.
Sent from my SM-A145F using Tapatalk
I missed this first time around. I have a light above the lathe and also one of these.You want a big light source to minimise shadows. One of the LED ceiling lights for grid ceilings that's half the drop in tile size is great. Still want to add a point source that's behind the tail stock shining into the work piece so when you're working deep, you can see what you are doing.
Sent from my SM-A145F using Tapatalk
HL57L 5700K LED Work Light - Hare & Forbes Machineryhouse
I have it positioned such that I can use it on the lathe and also the mill.
Lazmo
Old and hopeless
No such fine handy work here ha ha.
Made a bike rack mount for our AVan.
The son in law has one of these CyclingDeal racks on his car, so did a quick and dirty bodgy up with MDF to see if it would fit and clear the car on full lock... tick.
So, broke out the Aldi DC stick welder, and have glued some 3mm angle together. The welds are not pretty, but my local trailer repair guy said they were fine.
Now to grab the van and fit it up.
ausdb
Being who he is
You want a big light source to minimise shadows. One of the LED ceiling lights for grid ceilings that's half the drop in tile size is great. Still want to add a point source that's behind the tail stock shining into the work piece so when you're working deep, you can see what you are doing.
Thanks for the comments, sorry I chucked a sneaky edit in after my original post, which made this hard to see. The LED fluoro is 600mm long not 60! so I'll go with that for the moment for overhead as I aleady have it but I'll get some of those half tile panels down the track and replace some of the other fluoros in the shed too. I did get an old fashioned adjustable arm lamp with it, but havent worked out where they had it mounted yet even though theres a machined bracket for it but no corresponding holes on the lathe or stand. I'll try clamping it off the back corner of the swarf tray and see how it goes.I missed this first time around. I have a light above the lathe and also one of these.
HL57L 5700K LED Work Light - Hare & Forbes Machineryhouse
I have it positioned such that I can use it on the lathe and also the mill.
fjohn860
Alice in diaperland
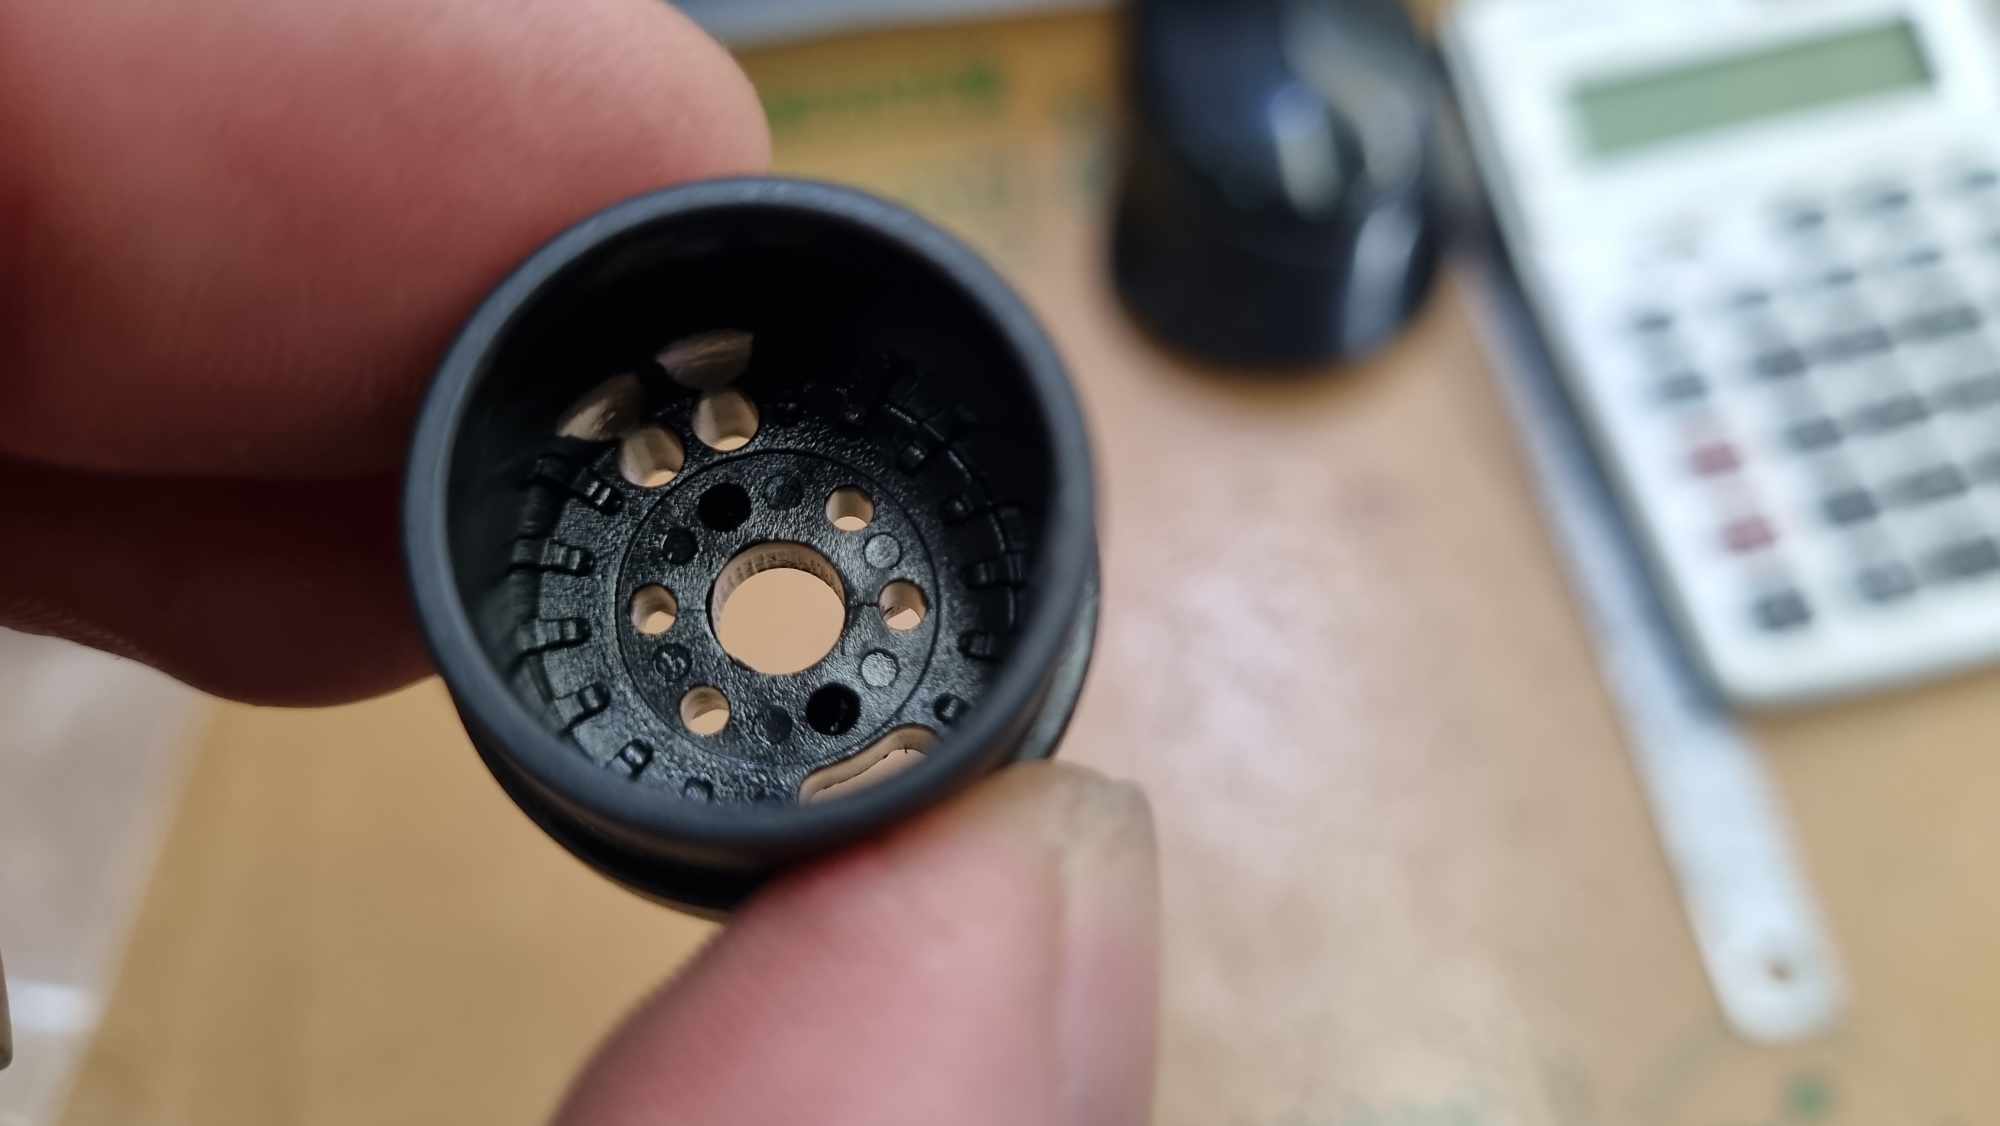
Damper mods yesterday.
Compression piston had a step creating a preloaded shim stack. It's a charger rc damper so has a cheap plastic piston. Used an end mill with a sleeve around it to centre it in the piston recess. Then faced off an m8 countersunk screw head and stuck some 800 grit paper on it to smooth out any end mill marks.
Standard piston with step just outboard of the centre 4 ports.
Step removed with surface smoother than stock:
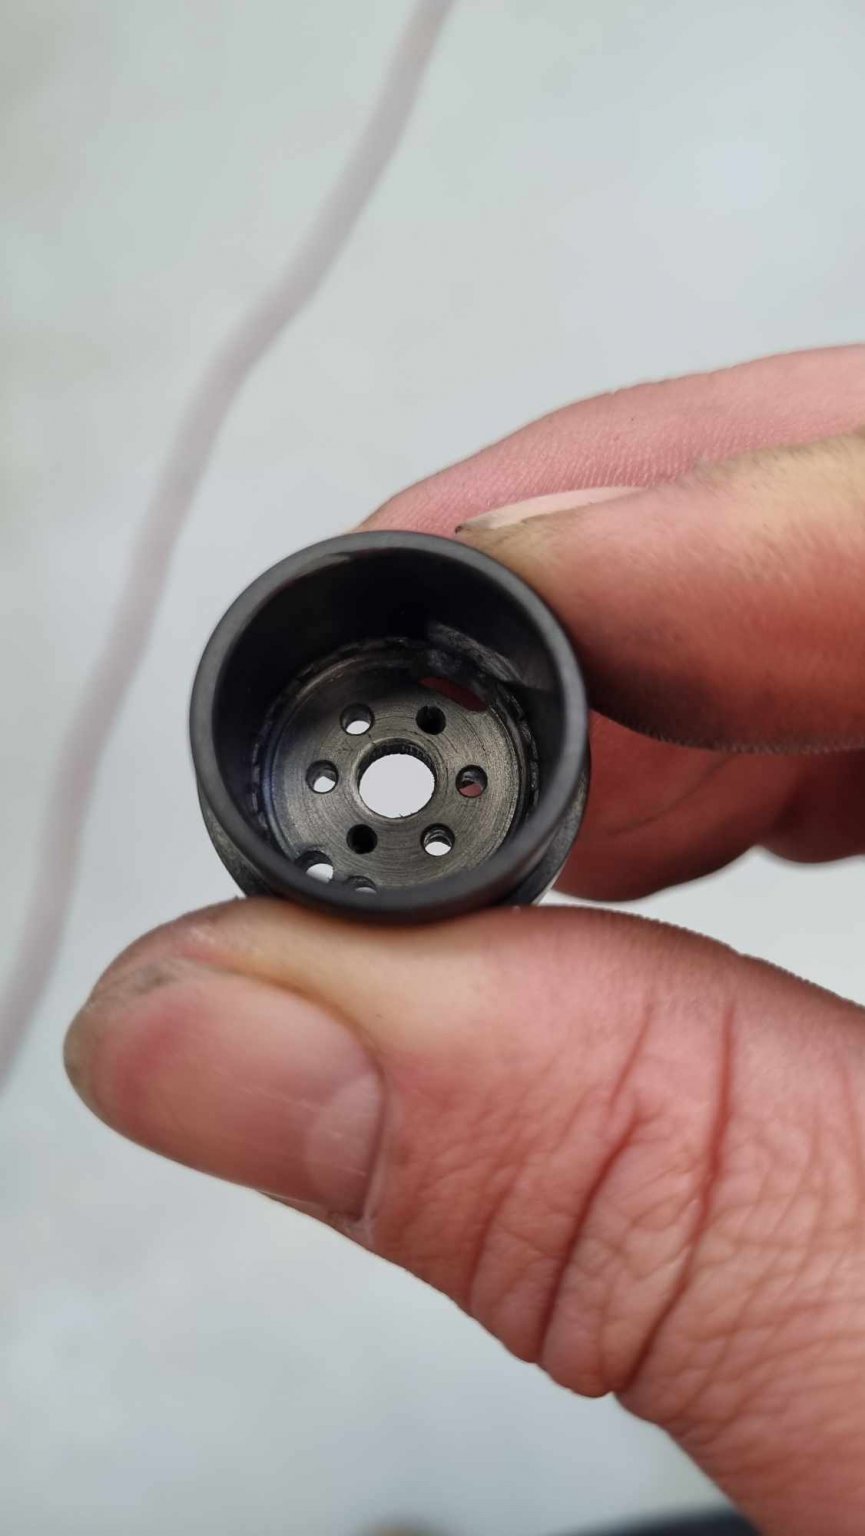
Side-note: may have to reverse engineer an aluminium piston down the track as I found a couple of small cracks when I removed the shims.
Compression piston had a step creating a preloaded shim stack. It's a charger rc damper so has a cheap plastic piston. Used an end mill with a sleeve around it to centre it in the piston recess. Then faced off an m8 countersunk screw head and stuck some 800 grit paper on it to smooth out any end mill marks.
Standard piston with step just outboard of the centre 4 ports.
Step removed with surface smoother than stock:
Side-note: may have to reverse engineer an aluminium piston down the track as I found a couple of small cracks when I removed the shims.